Share this article:

Facebook Twitter

These three makes are amongst my most favourite. They showcase a range of my exploration and love affair with denim. Earlier in the year I was lucky enough to attend a denim workshop led by Endrime at Blackhorse Lane Ateliers, where I made my very own pair of jeans from scratch. Yes from scratch….!  Before the workshop my emotions ranged from pure excitement to pure fear! I come from a fine art background and a fairly conceptual take on it at that, as a self-taught pattern cutter/sewer. I did feel slightly nervous. How complicated was this going to be? Would it look professional? More worrying: would mine fall apart after one wear…should I even wear them? What if I get stains all over them…?

Sewing scratches together
A jeans made of scratch

But I made them. I wear them. I LOVE THEM! And I freeze them when they need laundering {best way to look after denim!} After this my love affair with denim grew and grew and I became fascinated with the simply sublime architecture of denim garments. I fell in love with the traditional artisan way of felling and the touch of indigo dyed cotton.


My next denim artefact was in fact a £1 pair of jeans… I found these in a charity shop in Portslade and loved the waistband. It was the first thing that attracted me to them, but it just needed shifting over a bit to fit more snuggly. So that’s exactly what I did. I marked out and cut out new button holes and left the rest to show the story of the previous owner and the beginning of the story of their now new owner.

Fixed waistband


After that I couldn’t resist and went for a ‘hat-trick’. I dug out the two old pairs jeans I had in the loft and created my final piece which I really like. It weighs a hefty amount but that is one of the things I love about denim. Its robust weightiness! Unpicked the two pairs of jeans and re-stitched them together on the inside leg to create a full length skirt…and the Denim love still lingers on. What I particularly like, is that I went through the process of making a pair of jeans from scratch to making only one alteration in the two second pieces. Both confidently inspired by my new found knowledge of jeans making!

Two jeans from the loft
Restitching them together


Georgina Hooper is an academic, artist and textiles designer, teaching fashion, textiles, art and craft based therapy through the concept and practise of mindfulness. By professional practise she is an Artist who explores the interrelations between performance, fashion and textiles. As a Textile Designer with an alchemistic angle, she is exploring curious ways of merging and cross contaminating processes and techniques together, conceptually, physically and sustainably. She is the founder of SU:STAIN – which is my ongoing research practise exploring mindfulness and creativity through sustainability in the here and now through outreach workshops across the UK and beyond.


Share this article:

Facebook Twitter

Ever since I attended a workshop on plant dyeing in July, I have been fascinated by natural dyeing and actually had a great desire to collect some dyeing plants to experiment with in winter. Unfortunately, the summer went by too fast and I missed collecting the plants. Hopefully, in spring I will remember to seed one or two suitable plants in the garden.

This fact made me even happier, when I discovered that Elke Fiebig from still garments offered a workshop on dyeing with avocado pits as part of the MAKE SMTHNG week. You were supposed to bring a light-coloured pre-washed garment with you, preferably made of cotton or an other natural material. Of course you should bring along an avocado pit as well.

I decided to dye a cheesecloth and make a scarf out of it. For me, as I mainly wear black, a daring idea…

Elke Fiebig | still garments

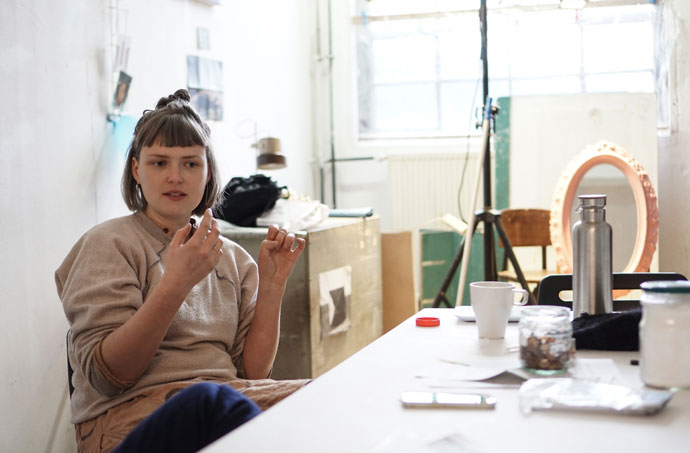
So I started out equipped with fabric and avocado pits. Elke had already prepared the room and equipped it with two large kettles. These were filled with warm water and dye extracted from avocado pits. Apart from me there were about 10 other participants who had brought along different clothes. Elke told us a lot about dyeing, materials and mordanting. Then we got started.

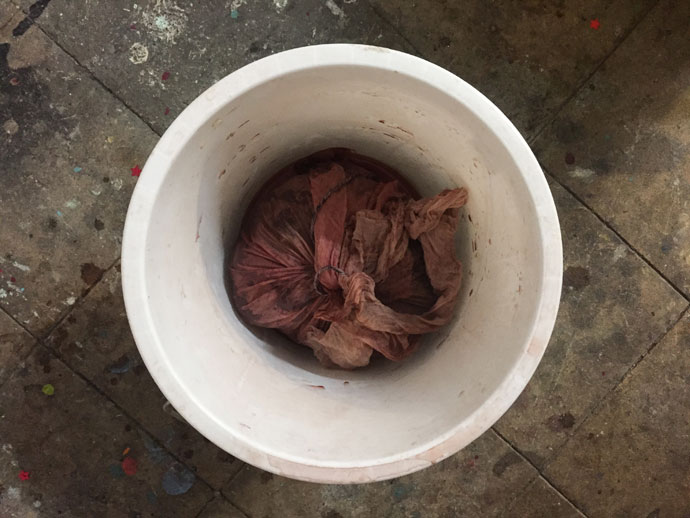
First we moistened our fabric with water and then put it into the dye. Every 10 minutes one of the participants stirred up the bath. In between we had time to talk to each other, to visit the other stations of the event, to buy a cup of coffee or a tasty dish made of rescued food for a small donation.

After an hour we removed our fabrics from the bath, squeezed them and left them to dry later at home. My scarf turned out beautiful. I just have to seam it and then I’ll dress up to show you. The great thing about dyeing with avocado is that you can easily do it at home as well. Because of tannins in the pits this dye doesn’t require a pre-mordant, but note that your colours will be rather light in that case. If you would like to try it for yourself, here are some informations…

Dyeing with avocado pits – this is how it’s done

Ingredients

  • We had about 150 g dried avocado pits for 100 g of fabric, but you can start with fewer.
  • White or unbleached fabric made of natural material such as cotton or linen (silk or wool can also be dyed, but make sure not to boil these!)
  • Large pot with a capacity of 15-20 litres.
  • Rod or spoon for stirrin.

Preparation
For the color:

  1. At the best, crush and dry avocado pits right after using them, or use fresh ones.
  2. Put the chopped avocado pits and about one litre of water into a lidded pot, bring it to a boil and let it simmer for about one hour on low temperature.
  3. Leave the seeds in the water and repeat the boiling process several times during the week, if your time allows. Add water if lots of steam evaporates.
  4. Usually there is quite a lot of dye in avocado pits and repeating the extraction helps for stronger colours.

Preparing the fabric:

  1. Pre-wash new fabric as hot as possible in the machine to remove any coatings or residues.
  2. Moisten the fabric or garment with water before dyeing.

Preparing the dye bath:

  1. Add enough water to your pot to fit your fabric nicely.
  2. Add your dye.

Dyeing the fabric:

  1. Carefully place the damp cloth in the dye vat, gently bring the temperature below boiling (or lower, if you dye silk and wool).
  2. Stir approximately every 10 minutes so that the dye can enter into all folds of the fabric. Watch out for air pockets which will cause uneven dye results.
  3. Elke recommends to dye for at least one hour (and only start your timer once the dye vat is at your desired temperature). After one hour remove the fabric from the bath, allow it to cool a little and wring it out.
  4. If you’re patient, dry fabric before rinsing.


Färben mit Avocadokern
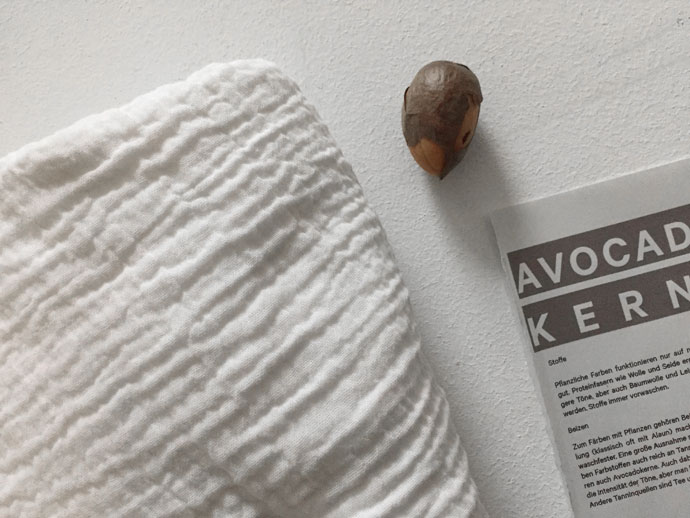
All the material you need
Molton Tuch Mulltuch Halstuch
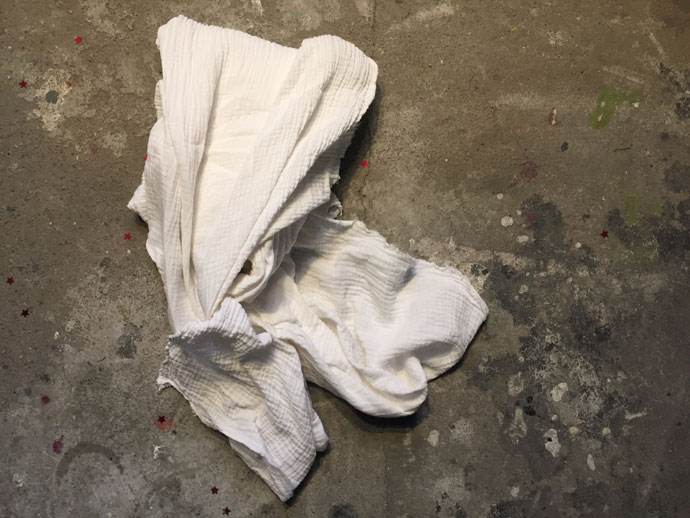
Cheesecloth | soon to be scarf
Farbbad rosa Avocadokerne
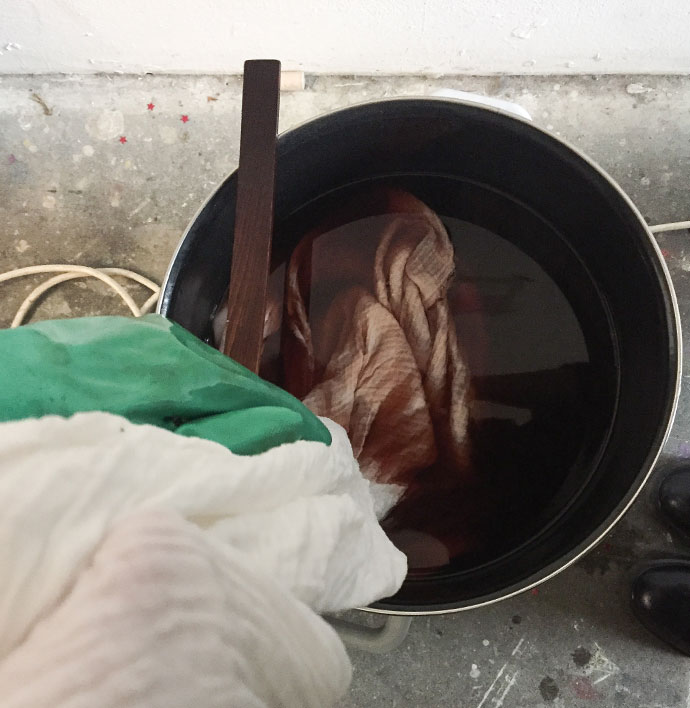
Soaking fabric in dye
Avocadokerne zum Färben
Draining and wringing out the fabric


Workshops for dyeing with plants

If you live near Berlin or Stuttgart, I can recommend to leave your big pots in the cupboard and register for a workshop at still garments instead. Everything is lovingly prepared, the other participants are really interesting people and your kitchen stays clean.

MAKE SMTHNG – buy nothing
The MAKE SMTHNG week was an international event organised by Greenpeace that focused on sustainability, foodwaste, recycling and upcycling. In Berlin, in the “Ateliers am Flutgraben” in Kreuzberg, there were workshops, lectures and maker-stations with no-waste-smoothies, self-stitched animals out of socks, woven wall decoration from bicycle rims, fermentation of vegetables, a repair-café, and so on, for three days. Most likely this event will be continued in the future and I will be happy to attend it again.


Carolin Engwert is the founder of hauptstadtgarten.de  a gardening blog about her allotment „Schrebergarten“ in the former East Berlin. In her articles the readers find advice for sustainable (urban) gardening, upcycling ideas, DIY tutorials, plant based recipes, a calendar with interesting „green“ events in Berlin and stories about all kinds of gardening experiments. Caro wants to encourage people to grow their own food, even if they live in a big city and even if they have only a balcony or a window sill to grow something. She loves to work with her hands and tries to explore different traditional as well as innovative techniques. With her blog, she aims to bring like-minded people together and she hopes to inspire them, to try something new every once in a while.


Share this article:

Facebook Twitter

Canadians make 545,000 tonnes of waste from gift wrapping and shopping bags every year. There will be an additional 300,000 tonnes of garbage created between mid November and New Years Eve and, if every Canadian wrapped 3 gifts in upcycled materials rather than buying wrapping paper new, enough paper would be saved to cover 45,000 Hockey rinks.

These are sobering facts. All these beautiful wrapping papers, ribbons and bows serve only a single use and most just get thrown away. This is an expensive and wasteful practice- both for our wallets and the planet.

This is why we added a Zero Waste Wrapping station to our Holiday Gift Swap last year, a collaboration between the Toronto Tool Library and MAKE SMTHNG week! It was a huge success and extremely popular with our swappers, so we’re running it again at the 6th annual Holiday Gift Swap on Sunday, December 16! Toronto zero waster Your Eco Friend will be running the wrapping station using some of the techniques listed below. Maps, t-shirts, upcycled fabrics and other upcycled materials will be available for you to use, but you are also welcome to bring your own!

Here are 11 zero waste wrapping techniques to help you make the Holidays a little greener:

1) Japanese Furoshiki (Japanese Art of Wrapping)

This might just be my favourite zero waste wrapping strategy. You can use a piece of fabric or material that you already have lying around the house, or check out your local thrift store to pick up some pre-loved fabric.

There are several different methods you can use depending on the size and shape of your gift. Check out this great guide for a variety of options.

2) Skip the Tape

From Trash is For Tossers 

Did you know you can wrap gifts without using tape?! Because let’s be honest – not only is tape wasteful, it’s just one more barrier between you and your present! Check out this handy guide from Trash is For Tossers on how to wrap effectively without using any of it.

If you must use tape, find an alternative to plastic tape – such as Washi, Paper Tape.

3) Use Leaves, Greenery and Other Foraged Sprigs

Skip the bows and ribbons and go foraging for leaves, pine cones, berries, cedar or pine branches, etc. These can be thrown right back outside and returned to the Earth when all the unwrapping is over.


Stock photo from Unsplash


4) Use Old Maps

Do you have a old maps lying around from a trip you took a few years back? If you don’t have anyone to pass them onto, consider using them to wrap up your Holiday gifts. Not only are you reusing to avoid buying new, it’s the trendy thing to do!

Photo from @itsahashtagelife, MAKE SMTHNG x Toronto Tool Library Holiday Gift Swap, 2017


5) Use Old Magazines

Old magazines, with their glossy finish and brightly coloured pictures, make for stylish and chic looking gifts.

Photo: Jane Means Blog 


6) Upcycle Old Magazines into Stylish DIY Bows

Not only can you wrap your gifts using old magazines, you can make bows out of them, too! Here’s how.


Photo from Wholeliving.com


7) Use Newspaper

Have some old newspapers lying around? Don’t recycle them just yet – they make pretty decorative looking gifts! And if you don’t have any yourself, head to caffee shop at the end of the day and they’ll happily pass off their old newspapers onto you. Here’s how to make those beautiful newspaper roses.

Photo from Donask.com


8) Use A Shirt

Check out your local thrift store for a cool shirt or use one you’ve already got. There are a few different ways to do this – check out these instructions for a button-up shirt, see Toronto zero waster Your Eco Friend demonstrate the technique here, or watch this online tutorial.


Photo from mydomaine.com


9) Incorporate Part of the Gift as the Wrapping

Are you giving someone a t-shirt, scarf, tote bag, baby blanket or some other cloth item as one component of their gift? Look no further for gift wrapping and use the above described Furoshiki wrapping method where appropriate.

Photo from Polkadotbride

10) Upcycle Old Cards to Make Your Own Holiday Cards & Gift Tags

I never buy cards new anymore – but I still receive cards from other people. I always hang onto them and pull them out at birthdays and holidays, using them to make my own cards to gift friends and family.

Rather than purchasing new Holiday cards or gift tags, why not make your own from cards you have received previously?


Photo from Goodhousekeeping.com

11) Literally Use Whatever You Have Lying Around!

“Consumers must recognize that the most sustainable item is the one that already exists.” – 2018 State of Reuse Report

Get creative, the sky’s the limit! I have a little basket in my home where I throw cards people send me, packaging paper or string on gifts and parcels, etc. I have recently begun adding some of my daughter’s school drawings into this bin as well (as she brings home far too many for me to keep, but I don’t want to throw them out).

I pull this basket of scrap materials out whenever I have to wrap a gift. This means I don’t have to waste money purchasing gift paper and I don’t generate any excess waste. Try it – it’s fun!

Photo from @Itsahashtaglife, a card made using old cards and paper from parcels, from my scrap materials basket


@itsahashtaglife is a social media manager, storyteller and blogger for non-profits and charities in Toronto. She uses the techniques of digital media marketing and storytelling to inspire an interest in environmental issues, motivating people to take action. She has been aspiring to live a zero waste lifestyle for the last three years, focusing on weaving the zero waste narrative into the broader, systemic issues that are at the heart of our throwaway society.


Share this article:

Facebook Twitter

To this day and ever since I was a little girl, when I ask my mom what she wants for her birthday or Christmas, she smiles and says, “Make me something.” I feel blessed to be raised in a family where a special experience together or a handmade gift is considered far more valuable than purchasing something from someone’s Amazon wish list.

Before I ever started Urban Air Market, a curated pop-up marketplace featuring local makers with socially responsible design practices, I’d host small holiday crafting parties with a couple of friends around my kitchen table. My favorite group project was hiking outside and collecting fall leaves together. Then, armed with white glue and rice paper, we’d make these candles:

When I grew up a little and got married, I liked sending my husband out for the night and having my girlfriends over to make homemade bath and beauty products. We’d save all of our empty glass and plastic containers for a year, study natural product recipes on YouTube, and then get together to make great smelling lotions, toners, and spritzes for our loved ones:


This year, Urban Air Market will have its first Holiday Show in Oakland, California’s Jack London Square. When the venue manager at 55 Harrison St. suggested that we host a community event in conjunction with their tree lighting ceremony on Friday, Dec. 1st, I jumped at the chance to host another crafting party, but this time on a much grander scale. I’m thrilled to see 20 different Urban Air Market vendor-led crafting stations spring to life for our attendees to make stuff together like:

  • DIY terrariums
  • Lip scrubs and bath salts with Himalayan salts and essential oils
  • Bracelets made from paracord and a buckle
  • Screen printed and ink blocked wrapping paper with silk dyed ribbon
  • Cold connection accessories and rings
  • Bandanas and toys for your dogs and cats
  • Handmade watercolor and collaged holiday cards
  • Hand bound notebooks
  • Hand stitched leather and ceramic tree ornaments

When people ask me why I started Urban Air Market, I say that it’s my way of promoting a more sustainable lifestyle, which seems especially important when taking into account how environmentally devastating the fast fashion industry and rampant consumerism are to our planet. I also say that we provide a platform for supporting small creative businesses and allow consumers to meet their makers face to face. Finally, Urban Air Market is a community event that brings people out of their homes, away from their computer screens for a couple of hours, and into real life where they can meet, talk, and laugh with each other.

Just as I was proud to help bring the awareness-increasing mission of  Fashion Revolution from the East Coast to the San Francisco Bay Area for the first time, I’m proud today that Make Your Own Holiday Gift with Urban Air Market will be included in the awe-inspiring list of community events on the calendar for MAKE SMTHNG Week this December.

During these uncertain times where people seem more divided than ever, I think it’s important that this holiday season we slow down, reconnect, and get back to basics. What better way for friends and families to share experiences and meaningful time together than through the art of crafting?

After producing successful art gallery events and runway fashion shows, Danielle Cohen got interested in sustainability and her mission to help creators reduce waste. At Urban Air Market, Cohen helps connect independent artists and designers with their ideal customers through a shopping experience that both builds community and supports the local economy. Whether it involves their packaging, delivery, upcycling, recycling, or the way they take the environment into consideration, the designers and businesses participating in Urban Air Market have to incorporate sustainable practices in some way. Follow Urban Air Market on Instagram

Share this article:

Facebook Twitter

MAKE SMTHNG Week is about taking action for a better world.

From Black Friday, Nov 23 till December 2nd, at the start of the holiday shopping season, we want to invite you to make something with us. In cities around the world, makers are gathering to demonstrate how we can unite to create unique alternatives to buying something new.

We are calling all DIY mavens, minimalists, vegans and vegetarians, upcyclers, swappers, sewers, crafters and zero wasters – you’re all invited to join Greenpeace in collaboration with #breakfreefromplasticFashion RevolutionShareable, the Fab City Global Initiative and the Fab Lab community, Arts Thread and many others to inspire you to make the most of our resources.

Many of you have already started to rediscover the art, craft and joy of making: cooking, mending clothes, fixing electronics, upcycling used goods, growing your own food. You’re making your own cosmetics; cleaning with vinegar and baking soda, ditching plastic and sharing your clothes, bikes and homes with each other. MAKE SMTHNG Week is your showcase for creative, innovative and unique alternatives to shopping something new.

Why?

Because we are buying too much stuff. There are billions of people on this planet who all shop for food, fashion and technology. To produce many of the goods we use, companies are contributing to climate change, destroying forests and polluting our oceans.

The amount of waste we create is mind-boggling. Every piece of plastic produced in the last 60 years still exists. As things get cheaper with planned obsolescence built in, we throw them away more often. In our consumerist societies, shopping counts for more than preserving things.


Plastic waste collected in Germany 

We buy twice as many clothes as we did 20 years ago, and wear them for half as long. It’s now cheaper to buy new things than to repair them. Even though our technology is advanced enough to instantly connect all corners of the world, we still can’t repair our mobile phones.

We need to shift from a throw-away culture to one where we value things again. We envision a world where we make the most of our resources. Each of us can take small actions in our everyday lives that together create a monumental change.

Make it last

Clothes Swapping Party in Germany

Instead of buying fast fashion and throwing it out after wearing it a few times, we can make our clothes last by caring for them and repairing them. To turn away from mindless consumerism, we can stop supporting companies which produce phones that can’t be repaired or have replaceable elements and start fixing things again.

When we replace meat with vegan or vegetarian alternatives, we turn away from the most inefficient way of feeding the world’s population. And whenever we bring a reusable bag and say no to single-use plastic and polyester fashion, we are preventing another piece of plastic from polluting our planet’s oceans and beaches.

Help us change the story of hyperconsumption: MAKE SMTHNG and MAKE CHANGE!


Lu Yen Roloff is the comms lead for the MAKE SMTHNG campaign at Greenpeace. She firmly believes in the power of connecting makers from around the globe to help fight overconsumption. She is totally in love with all the creative ideas from the movement and pledges to spend quieter times to DIY the hell out of the dark winter days! You can follow Lu Yen on Instagram @i.do.lu, Facebook luyenroloff or Twitter @lyroloff

Share this article:

Facebook Twitter
When it comes to Easter I love giving homemade gifts, there are so many different things that can be made for this holiday and I find it so much fun trying to come up with something new each year.

If you have a lot of people to buy for,  jars are a brilliant and affordable way to give/contain edible gifts and can be decorated in so many ways giving you loads of creative freedom.

Here is my step by step guide on how to make papier mâché Easter bunny ear jars…

What you will need:

  • Medium sized jam jars with lids
  • Newspaper
  • Toilet paper
  • Plain flour
  • PVA Glue
  • Sandpaper
  • Scissors
  • Paint (Colour of your choice)
  • Sweets/Chocolate for filling the jar


Due to the drying time of papier mâché and paint, I would allow at least 4 days prior to giving the gifts.

Steps:

  1. I used preserving jars so the first thing I had to do was super glue the centre of the lid to the frame of the lid to make sure I had a solid base to work on
  2. Tear your newspaper into strips and scraps ready for the papier mâché. Then mix together 1 cup of flour with 1 cup of water until you get a glue like consistency. Try and stir out most of the lumps. If it’s a bit thick, just add a little more water
  3. Dip the newspaper into the glue mixture and begin building the ears onto the jar lids. You want them to end up as smooth as possible so gradually layer the newspaper until you hopefully end up with something that looks similar to this…
  4. Now switch the newspaper for toilet paper as at this stage, you need something that is a little easier to mould and manipulate into a shape. Dip the tissue into the glue mixture and start padding out the back of the ears. You also want to cover the actual lid with either newspaper or toilet paper so that it blends in with the ears making it easier to paint. Once you roughly have the shape you want, pinch the ears together at the base and then leave to dry for at least 24 hours.
  5. Once the papier mâché has thoroughly dried, cut off any rough edges, you can also cut the ears to shape if needed. Then, mix the PVA glue with a drop of water, and using a brush, cover the ears in the glue. Leave to dry overnight.
  6. Once the glue has dried you should have a nice solid sculpture. You can now sand down any lumps and bumps and get the edges nice and smooth ready for painting.
  7. Depending on the type and colour of paint you have chosen you may need to do a couple of coats.
  8. Once the paint has dried thoroughly, apply one more layer of PVA glue to help prevent the paint from cracking.
  9. Now onto the fun part, filling the jars…I went to my local Poundland store to pick up mini eggs, easter marshmallows and Galaxy Golden Eggs, but you can fill yours with anything you like.
  10. Finally, putting the lids back on the jars you can finish them with a nice ribbon, string or a gift tag.


Lollie Dunbar is a textile designer from Oxfordshire.
Ducks all in a row is her little space for sharing thoughts, ideas and creations which all began because of her love for diy, design and organisation.
She really hopes that by starting a blog it could inspire others to find their own creative lifestyle.